Making LED light systems for RC planes

I have been experimenting with making my own LED light systems for RC planes for a while now. I first made my “RC plane hub” for one of my planes in 2019. It was a combination of a LED light system and gyro stabilization. More about that here: https://axelsdiy.brinkeby.se/?m=201911

Later I wanted a small simple standalone system that could easily be installed in any plane. I first made some experiments by just connecting a couple of transistors and LEDs to an Arduino Nano. After a bit of prototyping I made a custom PCB with a ATmega328 processor and some MOSFETs for controlling the LEDs.

V1.0 of my LED controlled board.

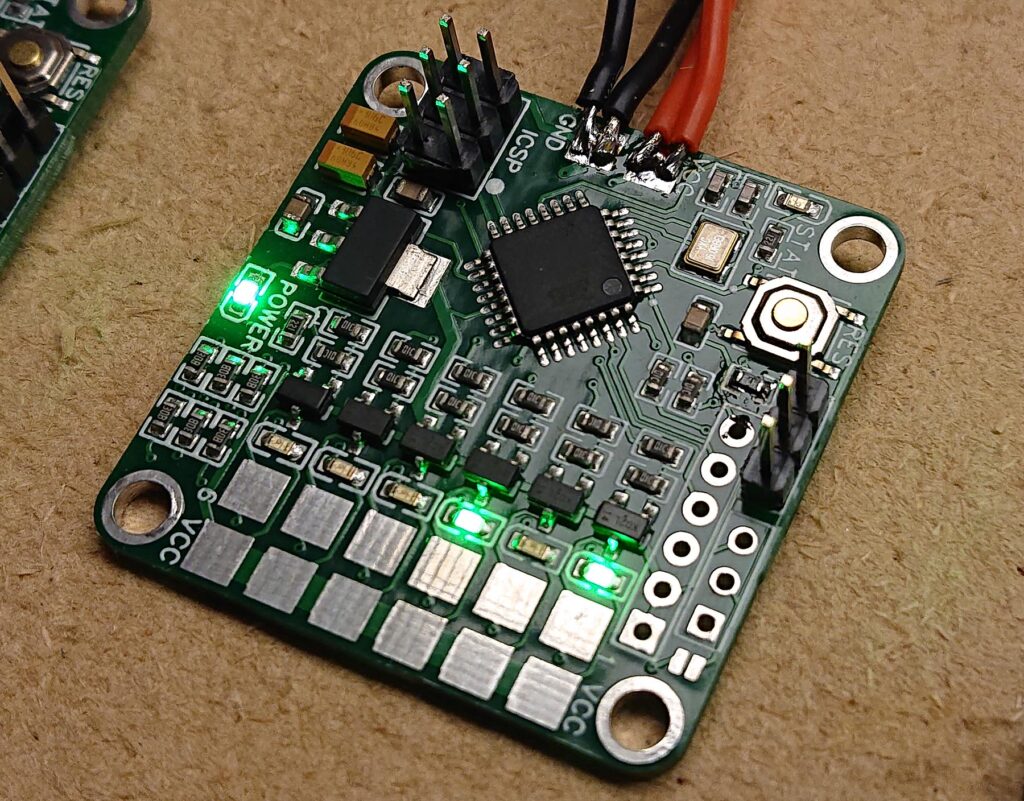
The idea is that this board is connected to the full battery voltage of the RC plane, and the outputs are connected to the LEDs. The LEDs themselves are connected on groups of three in series with a current limiting resistor adjusted to the LED type used and the battery voltage. The ATmega328 processor (same as Arduino Uno and Nano) reads a standard servo signal and controls and flashes the LED outputs in different ways depending on the input. This alows the pilot to control the LED from the RC radio.

I usually fly my RC planes on 4 cell Li-ion batteries. They are just over 16 volts fully charged and 12 volts when discharged. This causes the LEDs to be bright at the beginning of the flight and pretty dim at the end. Therefore I usually connected one of those small switching adjustable DC-DC converter boards between the flight battery and my LED board to convert the input voltage to 12 volts. When also adjusting the current limiting resistors for the LEDs to 12 volts this works quite well.

For the LEDs themself I use cold white surface mount LEDs for landing lights and strobe lights. I have made my own custom PCBs for them, as can be seen in the video above. For the colored navigation lights, I use standard 5 mm LEDs, of the brightest type I can find.

cold white surface mount LEDs for landing lights and strobe lights.

Later I made a new version of my custom LED controller board with a built-in fixed 12V switching regulator. Otherwise, it is the same processor, MOSFETs, and software as the first. I also skipped the indicator LEDs for each channel to save space on the PCB.

The new board is 60 x 25 mm. The 12V regulator can supply up to 3A to the LEDs. The MOSFETs can handle up to 3A each. Whish is a lot more than needed. The input voltage to the board can be up to 40V, or 10 li-ion cells in series. If the input voltage is lower than 12V the LEDs and the board will still work, but the LEDs will no be as bright.

Here is a link to my Arduino code: http://brinkeby.se/downloads/RCplaneLightSystemV2.zip

Feel free to use and modify the code as you like. This code can also be used an any standard Arduino Uno or Nano, not just my custom board

Here is my EasyEDA project with the PCB design: https://easyeda.com/editor#id=|d7bd0d7576e04ff88b89458a67529799|d44eedf4a12541269b71d3d20c136a3d

RC snow vehicle

Here is a video on an RC snow vehicle I built.

This is actually based on a design I built over 10 years ago. Back then it was smaller and power by a weak brushed DC motor. This a complete rebuild using heavier materials a stronger brushless motor. A single servo-controlled front ski is used for steering. I tried using a rudder also but it did not seem to help much. I have made front suspension with a spring, and the rear suspension is just the wires that the skis are mounted to that are flexing. The suspension is a key part of the design to improve stability at higher speeds.

The entire thing is built pretty fast, using 12 mm thick plywood that is mostly glued the screwed together. The skis are made out of 4 mm plywood and are painted with a layer of glossy paint on the underside.

There is still a lot of room for improvement. For example, this vehicle is pretty top heavy. This causes it to tip over easily when turning too fast. The torque from the motor can also cause it to tip over while accelerating too fast or turning to the right. It would probably be a good idea to make it wider and a bit lower.

In any case, it was an interesting project to experiment with!

Click on the image below to make it larger. It shows the vehicle in the same configuration as in the video.

More winter flying

Another video with more winter flying. This time with a few different airplanes. Me and a couple of friends flying at my local RC club: FK Gamen. It is actually pretty uncommon that we have this much snow here where I live. Usually, it just comes a few centimeters of snow that melts away the next day. But this time the weather was perfect. Lots of snow, low winds and sunny.

I found it interesting to experiment with different ski-designs. The planes with smaller skis struggle to stay on top of the soft snow. In the latter part of the video I have made new longer skis for my plane that work better in the soft snow.

Winter flying with skis

Made a set of skis for the Bush Beast 3. This video shows the first few testflights with them.

The skis are made out of 1.5 mm plywood and covered with Oracover on the underside for low friction. I piece of 1 mm piano wire is bent around the main landing gear and makes sure the skis are oriented the right way.

Lidar Robot

This is a video of my DIY Lidar robot. Here it is using a spinning laser distance sensor (Xiaomi robot vacuum spare part) to drive around and avoid obstacles. The sensor is connected to a Raspberry Pi running a Python script that is the main behavior program. There is no mapping going on, the robot is just going forward and turning away from things that are to close. The Raspberry Pi then sends serial data to an Arduino that controls stepper motors driving the robot.

The Xiaomi laser distance sensor is connected to a Teensy 3.2 running code from this project: https://github.com/getSurreal/XV_Lidar_Controller

The Teensy 3.2 is running PID speed control for the DC motor that spins the sensor. It is also reading the binary sensor data and sends it in easy to understand ASCII-messages over serial to the Raspberry Pi. The sensor spins at 5 revolutions per second and makes a distance measurement for every degree. Resulting in 360*5 = 1800 measurements per second. The accuracy is within a few centimeters. This sensor trigonometry to measure distance, in that way it is not a real Lidar sensor.


Bush Beast 3 electronics

Here is a video of me assembling the main electronics board used in my Bush Beast 3 RC airplane.

A Teensy microcontroller is used to read a decode an S-bus signal from the receiver and make all the servo signals. It manages servo mixing and gyro stabilization, as well as controlling LED lights on the plane.

More info about this, including schematics and code can be found on the Bush Beast 3 page here: Bush Beast 3 page

There you can also find some build-images

Two new airplanes

I got myself two new airplanes this summer at an RC plane auction that was organized at my local RC flying club FK Gamen.

The first one is a J3 Cub ARF model by Thunder Tiger with a wingspan of about 2.2 meters. The model came with a 4-stroke nitro engine that I have replaced with an electric power system. I will make a new landing gear with suspension and fix the motor cowling. I will probably add some kind of gyro stabilization also, this plane is surprisingly unstable in windy conditions.

The second plane is a Flair Magnatilla. The wingspan is about 1.6 meters. This is my first airplane with a nitro engine. A 4-stroke Saito. I will probably add a steerable tailwheel and make a few other adjustments over the winter.

Video: Bush Beast 3

Bush Beast 3 is an RC bush plane that I have designed and built during this winter. The plane is built using balsa wood and covered with Oracover. The design of this airplane a combination of Trent Palmer’s Kitfox, the Pilatus Porter, and various Cub planes.

I have made a custom electronics system on this plane. A Teensy 3.2 microcontroller reads the S-bus signal from the RC receiver and controls all the servos, it also applies 3 axis gyro stabilization and manages all servo mixing and a custom lighting system. More about that in a future video.