Prototyping and testing of the balancing robot

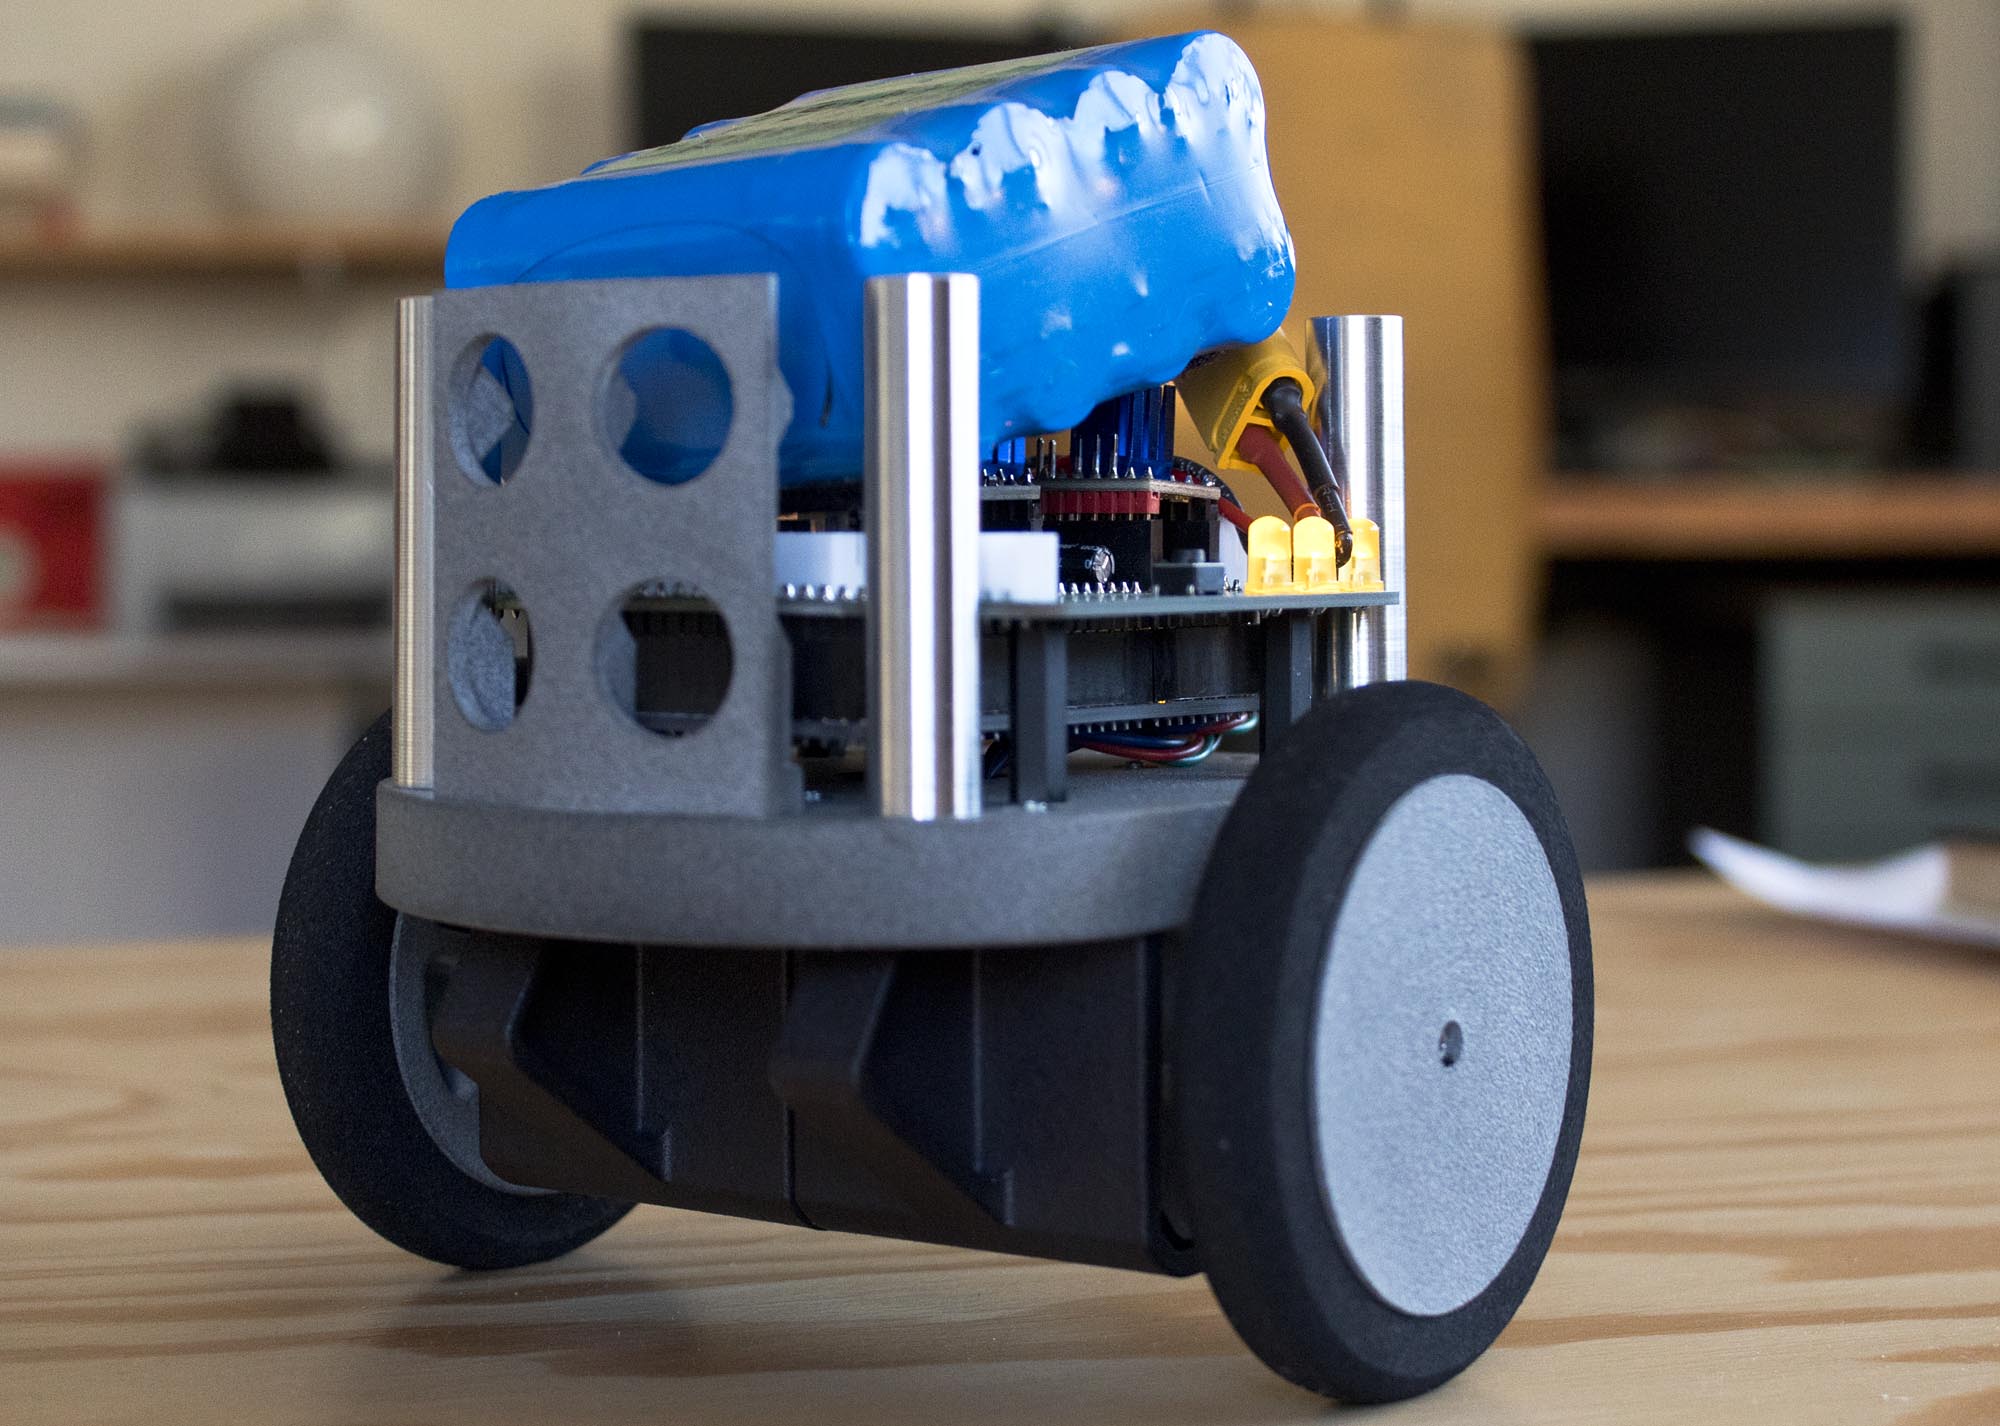
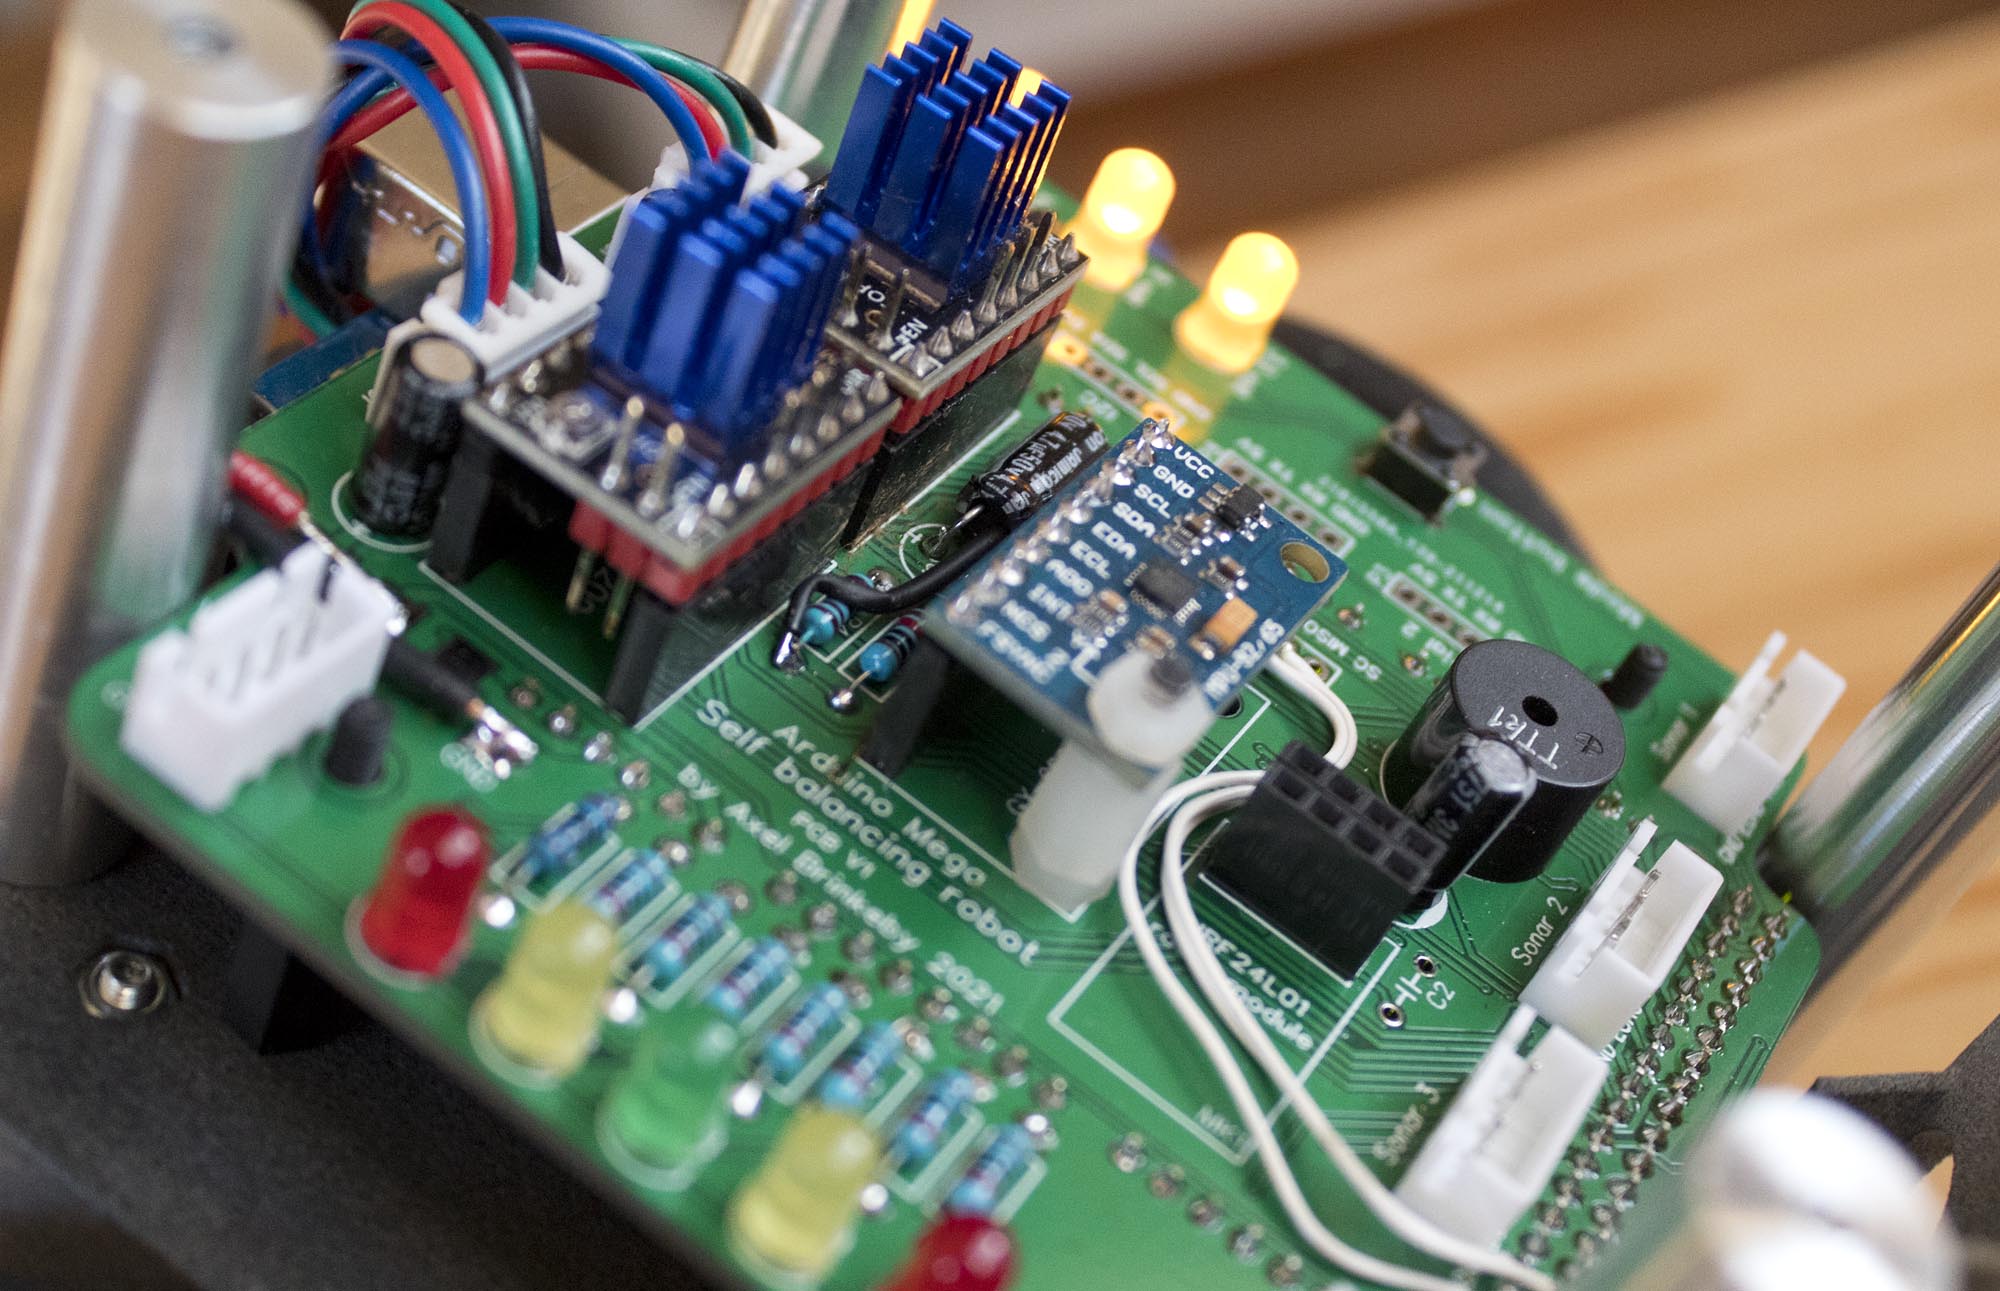
Made some progress on the balancing robot project. In this video, I made the first version of the PCB. It had a few problems but I still got the robot to balance. Some of the problems included:

  • Design error with the voltage divider and filter capacitor for the battery voltage measuring. Capacitor blew up 🙂
  • I forgot to connect the MISO, MOSI and SCK lines for the SPI bus.
  • Problem with the fotprint for the wireless module.
  • And a few more minior things…

Apparently, I need to check everything more carefully. Especially with the schematic, before I start to design the PCB itself. I hade also learned from many previous PCB projects that I have made, including this one, that you always need to create important/special component footprints yourself. Comunity-made footprints always have some errors, or something just decisions that I don’t like/want. Enev official footprints for components can have major problems.

In this video, I also show some of my planning of the remote controller for this robot. It will be a custom remote controller with an LCD and two analog control sticks. The controller should be able to control the robot, maybe in different ways. It will also have some kind of menu system for making adjustments to PID values and other settings.

Robot balancing by itself. The battery is just laying there on top. The robot will of course have a top plate for the battery when it is done.
Detailed shot of the first version of the PCB. Here you can also see the wires I had to solder on the connect the PIS bus for the IMU sensor.

Happy New Year!

Here is a compilation of some of my videos/projects from the past year. Plans for 2022 are to continue to make projects I find interesting. Everything from electronics to RC stuff. I will probably start the year by working on and finishing the new balancing robot.

I want to experiment more with ArduPilot also, making a multicopter platform for some experiments, and also ground rovers or maybe a boat.

Maybe I will also experiment with some new content on my YouTube channel. New video formats/video ideas etc.

Maybe I will also post some game-development-related stuff in the coming year. It was a few years since last I posted such things. But a have actually made some stuff that I have not shared. Including a DIY Unity-based RC plane simulator.

Bush Beast 4 – My new RC Bush Plane

An iteration of my previous design, the Bush Beast 3. This plane has larger control surfaces and larger flaps than previous models. I also made a new landing gear design based on Mike Patey’s Scrappy plane. Of course, I still have all the features of my previous version, including reverse thrust, a DIY light system, and also a DIY gyro stabilization system to make it fly stable in high wind conditions.

More info here: The Bush Beast 4 page

Bush Beast 4

A new self balancing robot

I started a new two-wheeled self-balancing robot project. I have built a few balancing robots before. This time, I want to make it even better. Trying out some new things while also making the robot even better documented and easier to replicate.

In this video, I make the chassis using 3D printed parts. The parts were sponsored by JLCPCB who 3D printed them for me. The parts are made out of PA-12 Nylon using MFJ 3D printing process. But those parts can also be printed using any standard filament printer you may have at home.

In later videos, I will make a PCB and show how I code and tune the robot. The robot will be remote-controlled, and also have an autonomous obstacle avoidance mode.

Here is a link to the 3D CAD files (Fustion360 files and STL files for 3D printing): http://brinkeby.se/downloads/2021%20Balancing%20Robot%203D%20CAD%20files.zip

The soft foam tires used are from RC plane wheels. I got them from this Swedish RC hobby shop: https://www.mbs-rcmodels.se/hjul/lattviktshjul-76mm-11g-2-pack/ I don’t think they ship outside of Sweden, or maybe they do. Maybe it is possible to find other tires that fit. I have also included STL files for the tires in the downloads if you want to try and print them out of TPU or similar.

DIY FrSky telemetry multi-sensor

I made my own “multi-sensor” for the FrSky radio system. An Arduino Nano reads a few different sensors and sends all the data to the Smart-Port connector on the RC receiver. This way I can get information such as battery voltage, speed, altitude, GPS position, and temperatures on my RC Radio when I fly my RC planes. This is perfect for planes that don’t have a flight controller onboard.

My design and hardware is based on the FrSky library from Pawelsky: https://www.rcgroups.com/forums/showthread.php?2245978-FrSky-S-Port-telemetry-library-easy-to-use-and-configurable

I actually started experimenting with making my own telemetry sensors a few years ago. Therefore my code is actually quite old. Back then, this was the only library available. I still think it works well, but today there are also other alternatives available.

At first, I just soldered a GPS and a servo connector to an Arduino NANO. But later I made a few PCBs to make them easier to assemble. My first versions had voltage monitoring of the individual cells in the flight battery, but I found that it was annoying having to plug in the balance connector of the battery in the plane.

This is my third iteration of the board. It has a single input for LiPo battery voltage monitoring with a voltage divider and filter capacitor, a BMP280 barometer for altitude and variometer measurements, a connection for a Beitian BN-220 GPS or any other NEMA capable GPS for speed and position data, and two Dallas DS18B20 temperature sensors, one onboard and one attached with cables.

Update 2022-01-07: I fixed an error in the PCB design and made a few small adjustments in the code. The links are now the updated versions.

Link to my schematic and PCB: https://oshwlab.com/Axbri/frsky-telemetry-v3

Download link for my code, schematic and PCB gerber-files:
Axels FrSky tememetry sensor V4.zip

I built a CNC machine

Mostly designed to make parts for RC planes from balsa wood and thin plywood. But of course, the machine can be used for other stuff as well.

Here is a page with more info about the machine: DIY mini CNC router

Here is an overview video that also shows the machining of some test parts.

In this video, I am making a few simple parts that will be used in the wing of an RC plane.

More autonomous landings with my ArduPlane project

I have been doing some more flying the last months, finetuning and trying to improve the autonomous flying capabilities of my ArduPlane-plane.

Here I have made a page about this plane with more info in images: 2020 ArduPlane project

In this video I have installed an airspeed sensor (pitot tube) and a downwards facing LiDAR rangefinder. Thiss allowed the plane to land more predictably.

In this video, I think I have gotten the landings to work pretty well. Here I am flying a butifull evening with no wind. I will continue to experiment to test in other conditions with more wind in the funire.

FPV videos

I have been flying a lot of FPV quadcopters this summer. In the spring I got the DJI digital FPV system. I previously used Echine EV800 box-goggles, and of course, it was a big difference. Not only is the image quality on a whole other level, the goggles themself are a lot more comfortable to where and use. This upgrade made FPV flying a lot more fun. I have been flying and training a lot. Trying to learn different freestyle moves and also flying through gates and hitting smooth resing lines. But chasing other drones and airplanes is probably what I find most interesting. Below are two videos.

In this first video I am chasing a Multiplex Solius Glider. Probably one of the easiest kinds of RC airplanes to follow. It is flying relatively slow and is large and easy to see. This video was recorded on a GoPro Hero 8 camera. 4K60 with “hyper smooth” turned on.

In this second video, I am chasing a small 5-inch quadcopter that is running INAV firmware with a GPS. It is flown FPV in position-hold mode by a 80-year-old man in my RC flying club FK Gamen. He has been flying a lot of RC planes over the years, and now he is getting into FPV quadcopters. This video was recorded using my older GoPro Hero 3 Black, which I have since sold. The new Hero 8 was a big upgrade.

DIY 5 volt regulator for RC models

I made my own redundant BEC module for RC models. It takes full battery voltage (usually 4 or 6 lithium cells in my case) and regulates it down to around 5 volts to power servos and other electronics.

My design uses two separate LM2576 switching regulators that power the output through diodes to isolate them. I also have an extra output filter to minimize ripple and voltage spikes. My goal with this project was to create something that is more heavy-duty and reliable than most cheap BEC modules for RC models you can buy.

EasyEDA Schematic and PCB design: https://easyeda.com/Axbri/rc-model-redundant-bec-v2